Printing Media
Installing the Ink Ribbon
Cautions
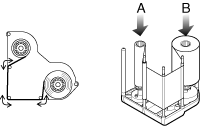
Stand the cassette on a flat surface as illustrated in the diagram. Avoid doing so on the floor as dust attached to it may cause printing errors.

Do not touch the inked surface (the side that faces outward when installed) with your hand. Touching it may cause printing errors. Put on the supplied gloves when handling the ink ribbon.
The cassette is heavy when the ink ribbon is loaded. To prevent the cassette from dropping during handling, make sure to hold it with both hands.
Do not perform any work on the printer door. Do not place heavy objects or apply load on the printer. Doing so may damage it.
Close
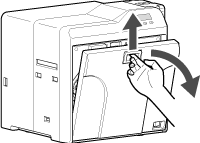
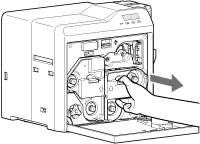
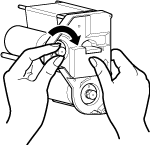
- Install while referring to the indication on the label of the cassette.
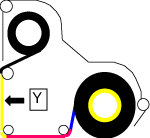
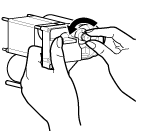
With the inked surface facing outward, align the yellow side of the unused ribbon with the arrow on the cassette, and unwind it along the three shafts.
Insert the ink ribbon firmly into the bobbin holders with the ribbon set to the far end of the guides.
- A: take-up side (black)
- B: unused side (yellow)
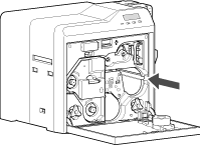
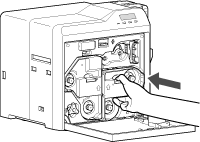
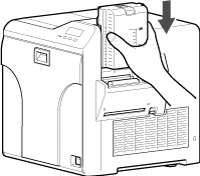
Insert the cassette all the way in along the guide rail until a “click” sound is heard, followed by closing the printer door
Memo
To avoid printing errors, it is recommended that you forward by one or two images after installing the ink ribbon cassette or retransfer film cassette.
Close
Close
Installing the Retransfer Film
Cautions
Stand the cassette on a flat surface as illustrated in the diagram. Avoid doing so on the floor as dust attached to it may cause printing errors.

Do not touch the retransfer face (the side that faces outward when installed) with your hand. Touching it may cause printing errors. Put on the supplied gloves when handling the retransfer film.
The cassette is heavy when the retransfer film is loaded. To prevent the cassette from dropping during handling, make sure to hold it with both hands.
When installing a new film, make sure that at least three black lines are wound onto the take-up side. Insufficient winding may cause the printer to malfunction.
Do not perform any work on the printer door. Do not place heavy objects or apply load on the printer. Doing so may damage it.
Close

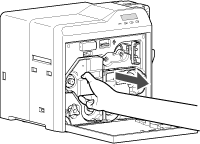
- Install while referring to the indication on the label of the cassette.
When installing the retransfer film, make sure that at least three black lines are wound onto the take-up side.
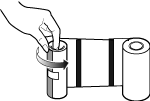
With the retransfer face facing outward, align the unused side of the film with the arrow on the cassette, and unwind it along the three shafts.
Insert the retransfer film firmly into the bobbin holders with the film set to the far end of the guides.
- A: take-up side (black)
- B: unused side (green)
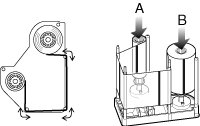
Insert the cassette all the way in along the guide rail until a “click” sound is heard, followed by closing the printer door
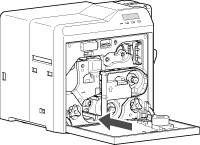
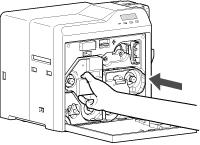
Cautions
While in the transport mode, the retransfer film cassette cannot be installed to the printer with the retransfer film loaded. With the printer door closed, turn on the power to cancel the transport mode.
Close

Memo
To avoid printing errors, it is recommended that you forward by one or two images after installing the ink ribbon cassette or retransfer film cassette.
Close
Close
Setting Cards
- The card hopper is able to store up to about 100 cards with a thickness of 0.76 mm.
Cautions
Get ready cards that are designated by the authorized dealer.
If the security lock is on, deactivate it. After work is complete, activate the security lock again.
Do not touch the printing surface of the card. Touching it may cause printing errors. Put on the supplied gloves when handling the cards.
To prevent card jams from occurring, limit the number of cards stored in the card hopper at any time to about 100 pieces regardless of the card thickness.
When using new cards, set them after making sure that they are not adhered to each other due to static.
Align the cards before setting them in the printer. Otherwise, the card hopper cover may not close properly, and this may damage the printer.
Printing the card on the side with the magnetic stripe may cause printing errors or damage to the card’s functions. If you want to do so, please consult our authorized dealers in advance.
To set cards with both functions (magnetic stripe and contact IC), follow the procedure for setting the contact IC card.
Close
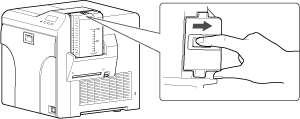
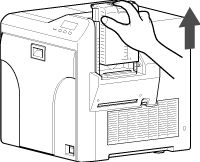
Magnetic stripe cards
- Set the card with the magnetic stripe facing upward and toward the printer, or facing downward and toward you.
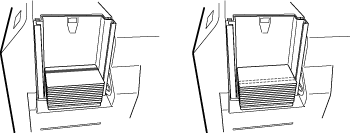
ISO contact IC cards
- Set the card with the Contact IC terminal facing upward and toward the rear of the printer, or downward and toward the rear of the printer.
- For single-sided printers, set the cards with the IC terminal facing down and toward the rear of the printer.
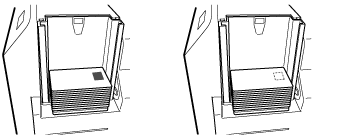
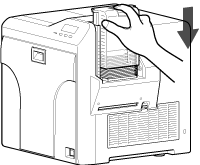
Adjusting card thickness
- The thickness of a card that is adjustable is between 0.25 mm and 1.00 mm.
This is adjusted to a thickness of 0.76 mm by default.
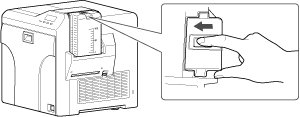
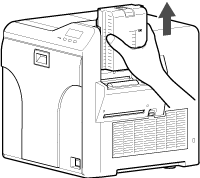
- Adjust according to the range of the card thickness used.
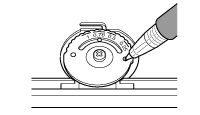
Memo
If the card cannot be discharged during printing, adjust the card thickness by turning the card separator in the clockwise direction by one scale at a time.
If two cards are discharged at a time during printing, adjust the card thickness by turning the card separator in the anti-clockwise direction by one scale at a time.
Close
Close

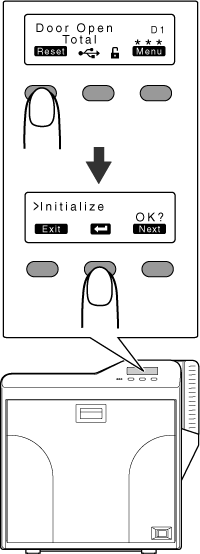
 to reset the printer