Servicing of Parts
Request for routine servicing
- In order to prevent printing errors and malfunctions from occurring in advance, please request for routine servicing by the servicing personnel. For details on servicing, please consult our authorized dealers.
Cleaning Roller
- The function of the cleaning roller is to remove any dirt or dust attached to the card.
- The color of the printed card may appear faded or dirt may appear conspicuous if the cleaning roller is dirty. Card jams may also occur as a result.
Print this page
Cautions
If the security lock is on, deactivate it. After work is complete, activate the security lock again.
Start work after ensuring that the power has been turned off.
If the printer is used every day, make sure to clean the cleaning roller daily at the end of the operation.
Do not perform any work on the printer door. Do not place heavy objects or apply load on the printer. Doing so may damage it.
After washing, allow the cleaning roller to dry completely before installing it to the printer.
Do not wash the cleaning roller with anything other than water (e.g., alcohol).
Replace the cleaning unit with a new one after using it for about one year. For details on its replacement, please consult our authorized dealers.
After cleaning is complete, check to ensure that all dismantled parts are restored to their original positions. Failure to restore the parts may result in malfunction of the printer.
Close
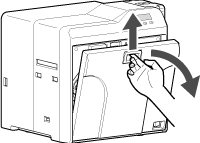
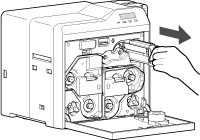
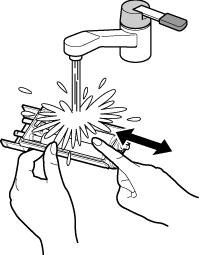
- Wash the roller with water, and remove any dirt from the surface of the cleaning roller with your finger.
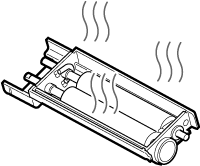
- With the roller facing the right, insert it all the way in.
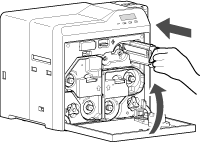
Close
Card Load Roller
- Card jams may occur if the card load roller is dirty.
Print this page
Cautions
If the security lock is on, deactivate it. After work is complete, activate the security lock again.
Start work after ensuring that the power has been turned off.
After cleaning is complete, check to ensure that all dismantled parts are restored to their original positions. Failure to restore the parts may result in malfunction of the printer.
For details on separately sold items, please consult our authorized dealers.
Close
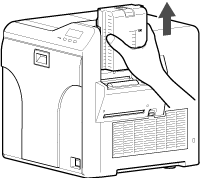
Apply alcohol (sold separately) to a wiper (sold separately), and use it to wipe the surface of the card load roller
- Wipe while turning the card load roller in the anti-clockwise direction.
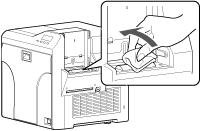
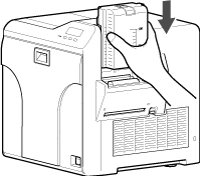
Close
Fan Filter
- The color of the printed card may appear faded or dirt may appear conspicuous if the fan filter is dirty.
- Perform cleaning after printing about 10,000 cards.
Print this page
Cautions
Start work after ensuring that the power has been turned off.
After cleaning is complete, check to ensure that all dismantled parts are restored to their original positions. Failure to restore the parts may result in malfunction of the printer.
Replace the fan filter with a new one after using it for about one year. For details on its replacement, please consult our authorized dealers.
Close
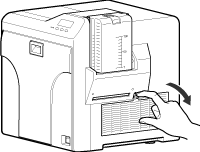
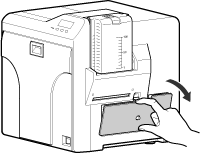
- Hold the filter with your hand to prevent it from being sucked into the vacuum cleaner.

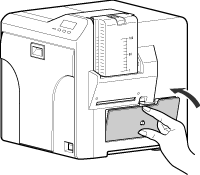
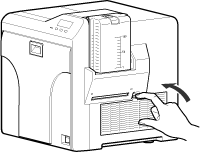
Close
Card Feed Roller/Heating Roller
- The color of the printed card may appear faded or dirt may appear conspicuous if the card feed roller or heating roller is dirty.
- Perform cleaning after printing about 1,000 cards.
Print this page
Cautions
If the security lock is on, deactivate it. After work is complete, activate the security lock again.
Before cleaning the card feed roller and heating roller, make sure that you clean the cleaning roller. Otherwise, dirt on the cleaning roller may be attached to the cleaning card, causing its cleaning capability to deteriorate.
Stand the cassette on a flat surface as illustrated in the diagram. Avoid doing so on the floor as dust attached to it may cause printing errors.

If card jam occurs when the cleaning card is inserted, turn off and on the power of the printer. Doing so automatically discharges the card.
Do not perform any work on the printer door. Do not place heavy objects or apply load on the printer. Doing so may damage it.
Each cleaning card can only be used once. Reusing a dirty card may dirty the roller or cause the printer to malfunction.
After cleaning is complete, check to ensure that all dismantled parts are restored to their original positions. Failure to restore the parts may result in malfunction of the printer.
For details on separately sold items, please consult our authorized dealers.
Close
Open the printer door. Press and hold down the cassette button, and remove the retransfer film cassette (on the left)

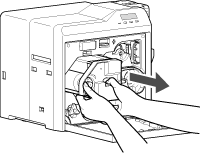

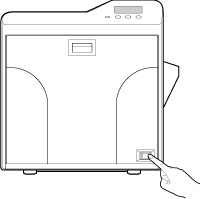
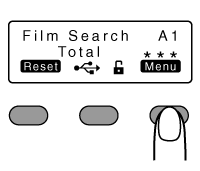
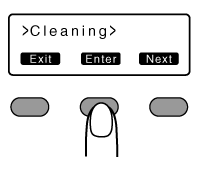
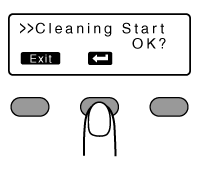
- A [Film Checking..] message appears, followed by a [Cleaning Start OK?] message.
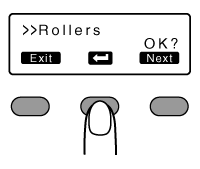

- A [Cleaning..] message appears.
Cautions
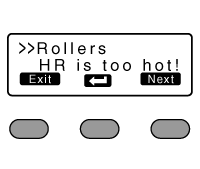
If the retransfer heating roller is hot, a [HR is too hot!] message will be displayed. Turn off the power, and perform cleaning after the retransfer heating roller has cooled down completely.
Close
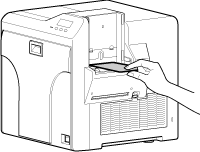
- The roller draws in the card, and cleaning starts automatically.
- A [Cleaning Start OK?] message appears after the card is discharged.
Cautions
Insert the card within 20 seconds after pressing  .
.
 .
.After pressing  , the buzzer sounds upon a lapse of 20 seconds, and a [Jam(Hopper)] error message appears about 10 seconds later.
Press

 to cancel the error.
 , the buzzer sounds upon a lapse of 20 seconds, and a [Jam(Hopper)] error message appears about 10 seconds later.
 Press

 to cancel the error.
When a standard-sized card is inserted, the card is automatically discharged from the NG card outlet, and a [Cleaning Start OK?] message appears.
Close
- Reverse the adhesive face, and insert the card.

After the cleaning card is discharged, turn off the power, install the retransfer film cassette, close the printer door, and install the card hopper
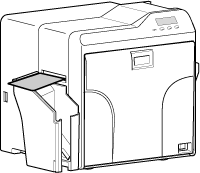
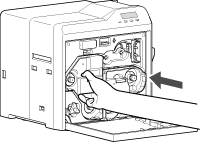

- To turn on the power again, do so after an interval of at least 10 seconds.
Close
Magnetic Head
- If the magnetic head is dirty, errors may occur during writing to or reading of the magnetic stripe card.
- Clean the magnetic head after approximately every 1,000 cards.
Print this page
Cautions
If the security lock is on, deactivate it. After work is complete, activate the security lock again.
Before cleaning the magnetic head, make sure that you clean the cleaning roller. Otherwise, dirt on the cleaning roller may be attached to the cleaning card, causing its cleaning capability to deteriorate.
After cleaning is complete, check to ensure that all dismantled parts are restored to their original positions. Failure to restore the parts may result in malfunction of the printer.
Do not perform any work on the printer door. Do not place heavy objects or apply load on the printer. Doing so may damage it.
For details on separately sold items, please consult our authorized dealers.
Replace the magnetic head cleaning card accordingly if it has become dirty. Using a dirty card may dirty the head and cause malfunction.
Close
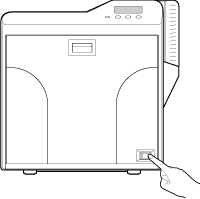
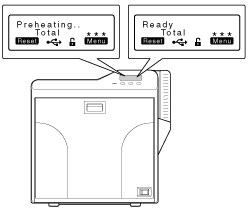

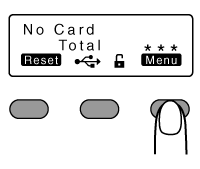
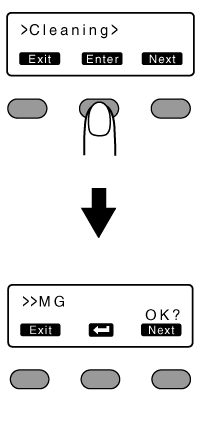
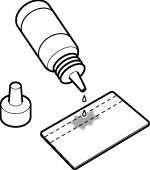
- Apply about three to four drops of alcohol on the position of the magnetic stripe.
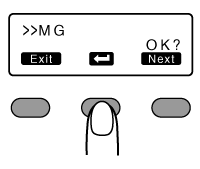
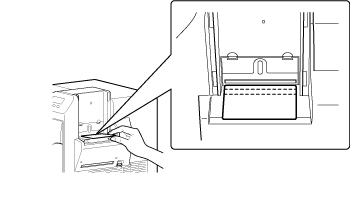
Cautions
Insert the card within 20 seconds after pressing  .
.
 .
.After pressing  , the buzzer sounds upon a lapse of 20 seconds, and a [Jam(Hopper)] error message appears about 10 seconds later.
Press

 to cancel the error.
 , the buzzer sounds upon a lapse of 20 seconds, and a [Jam(Hopper)] error message appears about 10 seconds later.
 Press

 to cancel the error.
Close
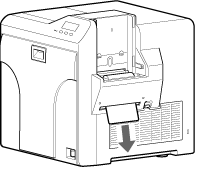

- To turn on the power again, do so after an interval of at least 10 seconds.
Close
Bobbin Holders
- If burrs produced by friction with the bobbins are attached to the bobbin holders, they may fall onto the card, ink ribbon, or retransfer film, causing printing errors.
Print this page
Cautions
If the security lock is on, deactivate it. After work is complete, activate the security lock again.
Start work after ensuring that the power has been turned off.
Stand the cassette on a flat surface as illustrated in the diagram. Avoid doing so on the floor as dust attached to it may cause printing errors.

Do not perform any work on the printer door. Do not place heavy objects or apply load on the printer. Doing so may damage it.
Perform cleaning each time you replace the ink ribbon or retransfer film.
After cleaning is complete, check to ensure that all dismantled parts are restored to their original positions. Failure to restore the parts may result in malfunction of the printer.
For details on separately sold items, please consult our authorized dealers.
Close

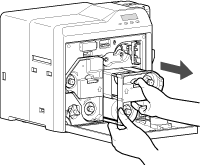
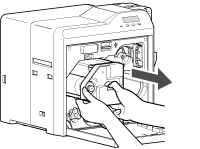
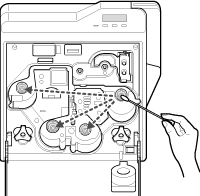
Apply alcohol to a cotton swab (large), and use it to wipe the four bobbin holders
(Cotton swab and alcohol: sold separately)
(Cotton swab and alcohol: sold separately)
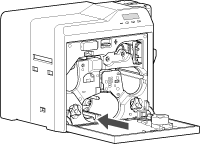
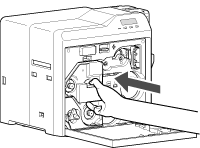
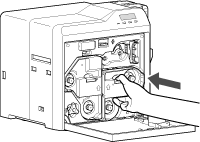
Insert the ink ribbon cassette along the guide rail until a “click” sound is heard, followed by closing the printer door
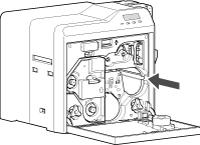
Close
Thermal Head
- Lines may appear on the card after printing if the thermal head is dirty.
- Clean the thermal head after printing about 10,000 images.
Print this page
Cautions
If the security lock is on, deactivate it. After work is complete, activate the security lock again.
Start work after ensuring that the power has been turned off.
Stand the cassette on a flat surface as illustrated in the diagram. Avoid doing so on the floor as dust attached to it may cause printing errors.

Do not perform any work on the printer door. Do not place heavy objects or apply load on the printer. Doing so may damage it.
Touching the thermal head with your body electrostatically charged may cause damage to the head. Make sure that you touch the metallic part of the printer before commencing work.
Pay attention to prevent metallic objects from knocking against the thermal head. Doing so may damage it.
After cleaning is complete, check to ensure that all dismantled parts are restored to their original positions. Failure to restore the parts may result in malfunction of the printer.
For details on separately sold items, please consult our authorized dealers.
Close


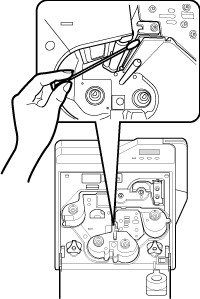
Apply alcohol to a cotton swab (large), and use it to wipe the thermal head
(Cotton swab and alcohol: sold separately)
(Cotton swab and alcohol: sold separately)
- Wipe the thermal head with care in the horizontal direction.


Insert the ink ribbon cassette along the guide rail until a “click” sound is heard, followed by closing the printer door


Close
 to set to [Cleaning]
 to set to [Rollers]
 to set to [MG]